So I looked for some rainbow pumpkins on YouTube and I found several melted crayon tutorials and it looked really really fun! Oh and right now I am doing this at like 7:00 in the morning ( thats what my computer says ) but it might be wrong because of the time change. But anyway, back to the pumpkin, you will need....
 first, lay out your trash bags ( I would do this outside ). Now, remove crayon wrappers by breaking crayons in half. Now, glue them onto the top of the pumpkin. And here is the hard part... use the hairdryer on high and wait for the crayons to drip down the pumpkin. Now wait for the wax on the pumpkin to harden.
Here are some examples:
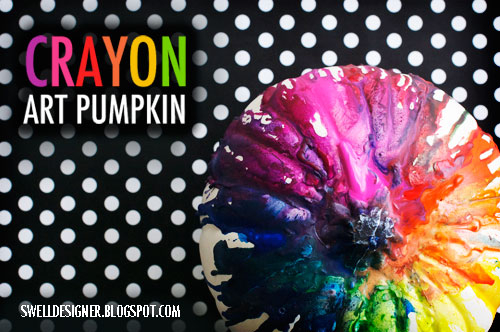 |
| Picture from swelldesigner.blogspot.com |
- A white pumpkin ( I would use fake )
- A hairdryer
- Tacky glue
- 20 crayons of different colors ( or the same )
- trash bags
first, lay out your trash bags ( I would do this outside ). Now, remove crayon wrappers by breaking crayons in half. Now, glue them onto the top of the pumpkin. And here is the hard part... use the hairdryer on high and wait for the crayons to drip down the pumpkin. Now wait for the wax on the pumpkin to harden.Here are some examples:

I painted a few pumpkins from AG's magazines. I definetley need to do this next time!
ReplyDeleteI wanted to do the painting it looks so fun!
ReplyDeleteCheck my blog diywithmiab.blogspot.com for the AG pumpkins!
ReplyDelete